Car scratches are inevitable, and no matter how hard you try to avoid all types of car scratches, there are some factors beyond your control that ends up leaving you with one.
A careless shopper can leave a deep scrape on your paint while pushing a shopping cart past your vehicle. The truth is no car owner fancy the sight of even the slightest scrape on their paint.

Well, you don’t have to get upset when next you see a scratch on your car. We’ve compiled a list of different types of car scratches, with a detailed guide on how to fix them yourself without any fancy car scratch repair kit.
Types of Car Scratches And How To Fix Them
Here are the 5 types of car scratches:
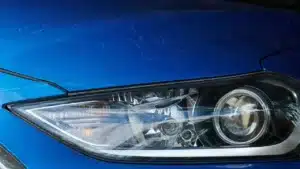
1. Clear Coat Scratch
Clear-coat scratches are the commonest type of paint scratches and the easiest to fix because they don’t go deep into the color coat. It is a transparent protective paint layer sprayed onto the color coat to protect it from damage and give the paint a glossy shine.
One way of getting clear coat scratches is by cleaning your vehicle with a dirty rag. The dirt on the rag will scratch the paint finish. Other minor scratches, like having someone rub their zipper against your vehicle or scratches from pet claws, can also create light clear coat scratches.
To check if your scratch is on the clearcoat, spray a soap-water solution on it. A scratch on the clear coat will disappear once it comes into contact with the soap water but reappear once the water dries off from the car’s paint job.
How to fix a clear coat scratch
A clear coat scratch repair at a professional repair shop or dealership costs about $100 to $300. But if you follow some simple steps, you can remove the scratch from your car’s body for only a fraction of what the dealership would charge. Below are the materials you’ll need:
- Turtle Wax Scratch Repair & Renew
- Meguiar’s Premium Paste Wax
- Microfiber Towel
- Tape
- Sand Paper (3,000 & 5,000 grit)
- Soap-Water Solution
Step 1- Prep the scratch area
Start by cleaning the scratched area with your soap-water solution to eliminate the dirt and prevent it from rubbing into the paint, thus creating more scratches. Once you are done cleaning, mask off the scratch using your tape.
Masking off the scratch makes it discernible, as it becomes difficult to see once you begin wet sanding. Place the tape about half an inch from the scratch on both sides.
Step 2- Sand down the scratch
Depending on how deep the scratch goes into your clear coat, you may want to start with a more abrasive — 3,000-grit sandpaper. But if the scratch is not that deep, you can start with the finer 5,000-grit sandpaper.
Wet the scratch surface and the sandpaper with the soap-water and begin sanding. You want to sand along the grain of the scratch and don’t apply too much pressure to avoid burning through the clear coat. You can fold the sandpaper into two and use its sponginess to even out the pressure.
Sand the scratched area for about ten to fifteen seconds, and wipe the area with your microfiber towel to check if the scratch is gone. Continue the sanding process until the scratch is completely gone, remembering to keep the scratch surface wet.
After sanding, you may notice a haze over the scratch area, don’t fret. Just expand the width of the tape on both sides to create a bigger area and proceed to blend the scratch into the surrounding paint using your 5,000-grit sandpaper. While blending with the 5,000-grit sandpaper, you want to move in a circular motion and continue until you’ve blended in the scratch.
Step 3- Polishing and Waxing
Before you start polishing, clean the surface to remove all the dust left over from sanding. You also want to check that you’ve completely sanded down the scratch. Else, it will be noticeable by the time you are done polishing.
Proceed to apply your Turtle Wax Scratch Repair & Renew to a clean microfiber towel, and you can begin polishing. Focus on the hazy area, rubbing the polish into the surface in a circular motion and blending it out into the surrounding paint.
Depending on how big the surface area you are working on is, two applications of the scratch remover is enough to work the magic. Get a clean part of your microfiber towel and lightly buff the surface to clean off the rest of the polish.
Now that you’ve eliminated the scratch, you can move on to apply the car wax on the scratch area to add that glossy shine and protect the clear coat.
2. Deep Scratches (Paint Scratch & Primer Scratch)
A deep scratch is any scratch that makes it past the clear coat into the color coat or primer coat. Your car comprises three different paint layers, a primer that goes over the bare metal, a color coat, and the clear coat.

The clear coat protects the base coat, and it is the thickest layer of a car’s paint, at about 40 to 100 microns thick. Any scratch that makes it past the clear coat is a deep scratch and can be further classified into paint or primer scratch.
- Paint scratches, otherwise known as base-coat scratch, is a scratch that goes past the clear coat into the base coat. With this type of scratch, the base coat, which gives the car its color, is exposed and, if left unattended, can create room for contamination and paint damage.
- Primer scratches are the deepest type of car scratches, as they penetrate through the clear coat and also make it past the base coat into the primer. These types of scratches are so deep into the car paint that, if left untreated, they can expose the body panel to oxidation and rust.
Deep scratches are caused by almost anything capable of scratching the clear coat but with a little more force. Deliberate acts, such as someone keying your car paint, can also create deep scratches. And unlike clear coat scratches that disappear once it comes into contact with water, a deep gouge will remain visible. You will also feel a deep scrape whenever you run your fingernail through it.
How to fix deep scratches
Leaving a deep car scratch repair to professionals could set you back about $150 to $1,200, depending on the depth of the damage. But if you plan on doing the repair yourself, a sure shot way to eliminate it and get the best result is to use a touch-up paint pen.
But you want to check that the paint pen matches your car paint code — every vehicle has its paint code inscribed on the driver-side door sticker. You should also ensure that the paint pen has an automotive clear coat and a sanding tip, as they’ll make your job much easier. Below are all the materials you’ll need:
- Matching Touch-Up Paint Pen
- Meguiar’s High-Gloss Ultimate Polish
- Isopropyl Alcohol
- Microfiber Towel
- Tape
- Sand Paper (400, 800, 1,000, 1,500, 2,000, 3,000 & 5,000 grit)
- Soap-Water Solution
Step 1- Prep the scratch area
You should start by cleaning the scratch area with your soap-water solution to eliminate any dirt or debris that could create more scratches when working. If you are dealing with a primer scratch, ensure you remove any rust from the scratch, as painting over such will make the paint bubble.
You can use the abrasive tip of the paint pen or 400-grit sandpaper for wider scratches. Now proceed to prep the scratch surface for the paint application by smoothly sanding its jagged edges to allow the paint to blend in much better.
Then proceed to round out the scratched edges using 800-grit sandpaper to give it a smooth transition. By the time you are done, you shouldn’t be able to grab the scratch with your fingernail. Once you are done, grab your isopropyl alcohol and wipe down the scratch to remove all the dust from the sanding before painting.
Step 2- Painting the scratch
Before painting, tape off both sides of the scratch to make your cleanup easier. Place the tape about one to two millimeters from the edge of the scratch. When adding the touch-up paint, ensure you fill-up the scratch and make it higher than the surrounding factory finish.
Using the paintbrush, apply the paint in very thin layers from the top of the scratch. While you might get the urge to go over the paint to smoothen it, you don’t need to, as the paint is self-leveling and will become smoother once it dries.
Leave the paint to dry for about ten minutes before applying another fresh coat. Once the second coat dries, apply another thin layer and leave it for another ten minutes. Depending on the depth of the scratch, you may have to repeat this process about three to five times to cover the scratch completely.
After filling the scratch, it’s time to sand down the touch-up paint to level it with the surrounding paint.
Step 3- Sanding and adding clearcoat
Before you start sanding, peel off the tape and check that the paint has fully dried. Wet sand the touch-up paint with 800-grit sandpaper moving in a back-and-forth motion along the scratch until it is leveled with the surrounding paint. You want the touch-up paint to even out with the surrounding paint. Once you are done, wipe off the sanding dust using a clean microfiber towel and proceed to add the clear coat.
Before adding the clearcoat, carefully inspect the scratch for uneven spots, as they’ll become much more difficult to tackle and visible when you are done. Once you are sure there aren’t any uneven spots, proceed to add your clearcoat, adding thin layers.
The aim is to seal up the touch-up paint with the clear coat while allowing a little overlap on the surrounding factory paint. After applying, leave it to dry for ten minutes and apply a second and final coat. Now, wait for about 45 minutes to an hour to allow the clear coat fully dry.
Once it dries, wet sand the clearcoat using 800 grit, 1,500 grit, and 2000 grit sandpaper to even out the clear coat with the surrounding paint. After sanding the clear coat, proceed to wet sand the entire panel with a 3,000 and 5,000-grit sandpaper to blend in the clear coat and prep the surface for polishing. You can put a kitchen sponge in between your sandpaper to even out the sanding pressure.
Step 4- Polishing
After blending in the scratch, clean off the sanding dust and proceed to polish the entire panel. Add your polish to your buffing pad and polish the entire panel using only circular motions. By the time you are done polishing, the panel will be shining.
While you might want to seal off the paint with car wax or ceramic coating to protect the panel, we advise that you don’t. Touch-up paint takes some days to fully cure and harden. Waxing the surface seals off the paint and prevents it from fully curing.
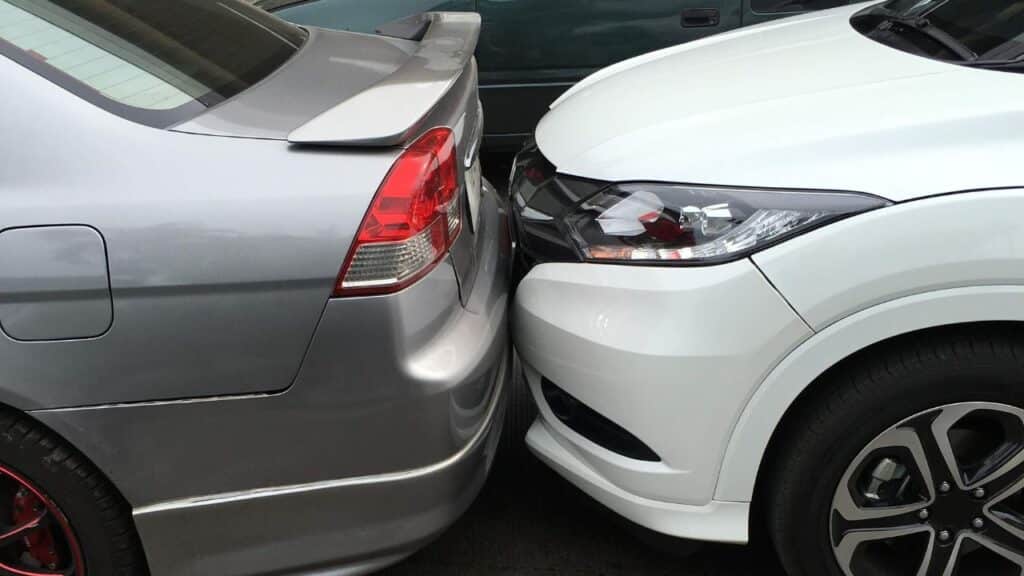
3. Paint Transfer

Paint transfer is another type of car scratch created by minor collisions. As its name connotes, the paint from the other vehicle or surface is transferred onto your vehicle paint, creating scuff marks.
But most times, the damage to the paint is usually minimal since paint transfers are usually embedded into the clearcoat and don’t penetrate into the color coat, except on some rare occasions where the damage goes deeper.
As we’ve earlier mentioned, paint transfers are often caused by minor collisions like slightly brushing a parked vehicle when trying to park or drive off a parking lot.
A quick way to identify whether your vehicle’s scratch is a paint transfer is to physically examine the damage and check if it lies on the clearcoat or goes deeper into the paint job.
How to fix a paint transfer
Unlike clear coat and deep scrapes that require sanding to eliminate the scratch, all you need for a paint transfer is mineral spirits or rubbing compound to soften the foreign paint. Below are the materials you’ll need:
- WD-40
- Mr. Clean Magic eraser
- Meguiar’s Premium Paste Wax
- Microfiber towel
- Soap-water solution
Start by applying the WD-40 to the area of the paint transfer. This helps to soften that paint transfer while also lubricating the surrounding paint. Now, soak your Mr. Clean magic eraser in warm water and start scrubbing the paint transfer.
You don’t want to apply excessive force with the magic eraser as that can cause your clear coat to come off with the paint transfer. The magic eraser is an abrasive foam and will remove the paint transfer with the slightest force. Focus on the paint transfer and scrub in the direction of the grain of the damage.
Spray on more WD-40 on the paint transfer if needed for adequate lubrication and to soften the remaining paint transfer. Once you are done removing the paint transfer, wipe it down with your microfiber towel. And spray on your soap-water solution and wipe it down with your microfiber towel to remove the remaining WD-40 from your paint.
Now that you’ve removed the paint transfer, proceed to wax the area to add that glossy shine and protect the clear coat from UV rays.
4. Glass Scratch

Car scratches aren’t limited to only paint scratches. It also extends to other surfaces, including glass surfaces — windshields and windows. Rubbing in dirt or using a dirty towel when cleaning is the primary cause of glass scratches. However, the leading cause of windshield scratches is often due to the metal-to-glass contact resulting from an old or worn wiper that was left unchanged.
How to fix a glass scratch
Hiring the service of a professional for your glass scrape will cost you anywhere between $150 to $500. What you need is an automotive glass polishing kit, and the process is quite straightforward. Below are all the materials you need:
- Automotive Glass Polishing Kit
- Electric drill
- Invisible Automotive Glass and Windshield cleaner
- Paper towel
Start by cleaning the scratch area using the glass cleaner and paper towel to remove any dirt that can further create scratches when you begin buffing out the scratch. Now, assemble the polishing pad with its backing and connect it to the electric drill using the universal drill attachment that comes with the kit.
Apply the polishing compound to the pad, and you can start buffing out the scratch. Depending on how deep the scratch is, it can take quite a bit of time to remove. Continue buffing the scratch, adding more compound once it begins to dry out to prevent the glass from getting too hot.
Once you’ve completely removed the scratch, get the cleaning cloth to wipe off the remaining cleaning compound and mess you’ve made. Now spray on some glass cleaner and wipe down your glass.
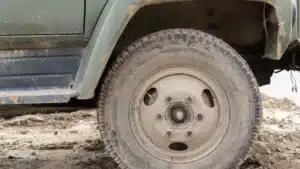
5. Wheel Scratch

The vehicle wheels are also susceptible to scratches as much as the paint job. Wheel scrapes, also known as curb rash, are mostly caused by going over a curb or driving too close to it, causing the wheel to rub the cub, invariably creating scratches and scuffs. Driving on a flat tire can also create wheel scratches or, worse off, damage the wheel.
How to fix wheel scratches
You’ll be amazed at what you can achieve with a little bit of sanding and spray paint. But if you intend to leave the process to a professional, you should budget between $100 to $500. Below are the materials you’ll need to fix a wheel scratch yourself.
- Sandpapers (80-grit)
- 3M Bondo Body filler
- Aerosol Spray paint (Primer, color coat & clear coat)
- Soap-water solution
Start by sanding down the car scratch with 80-grit sandpaper. Once you are done sanding, clean off the sanding dust and mix your body filler in the right proportion. Put the filler in the deeper scratches and leave it for about thirty minutes to allow it dry.
Proceed to sand down the filled part with 80-grit sandpaper to even the scratch with the rest of the wheel. Once it is nice and smooth, you can proceed to spray the wheel, but only after you’ve masked off the rest of the wheel.
You want to start with the primer applying a light coat moving across the wheel and spraying at different angles to get complete coverage. Allow the primer coat dry before following it with the paint coat and rounding it off with the clear coat. You want to keep the coat as light as possible and give each coat some time to dry.
What are the Causes of Car Scratches?
Car scratches are caused by a slew of factors, from collisions to flying stones and pebbles. Below are some causes of car scratches.
1. Dirty microfiber cloth

Cleaning your vehicle with a dirty microfiber cloth is a sure way of getting a clear coat or color coat scratches. The dirt on the cloth gets rubbed against your paint, scratching the paint.
A good rule of thumb is to always dust your microfiber towel before you start using it to get any loose rocks or dust that could scratch the car off. Also, never use a towel that falls to the ground on your vehicle until you’ve thoroughly rinsed it.
2. Automatic Car wash
Using an automatic car wash is another guaranteed way of getting scratches on your paint job. Dirt gets trapped in the bristles and cloth used and ends up getting scratched against your paint.

And even with the touchless type — where powerful jets of water stream is used — the water pressure can be excessive, pushing dirt against the paint, invariably scratching it. Luckily, a clear coat scrape is the most likely type of car scratch your vehicle may get when you use an automatic car wash.
3. Flying stones and pebbles

Having flying stone or rock chips flicked at your vehicle can also create scratches. But unlike car wash scratches, flying pebbles are also capable of causing circular dents on your vehicle panel or cracks on your windshield.
4. Collisions
Collisions are capable of creating all manner of scratches. From minor paint transfer and clearcoat scratches to deeper color coat and primer scratches. Most minor collisions happen in parking lots or when driving out of parking lots, and drivers misjudge their surroundings.
5. Vandalism
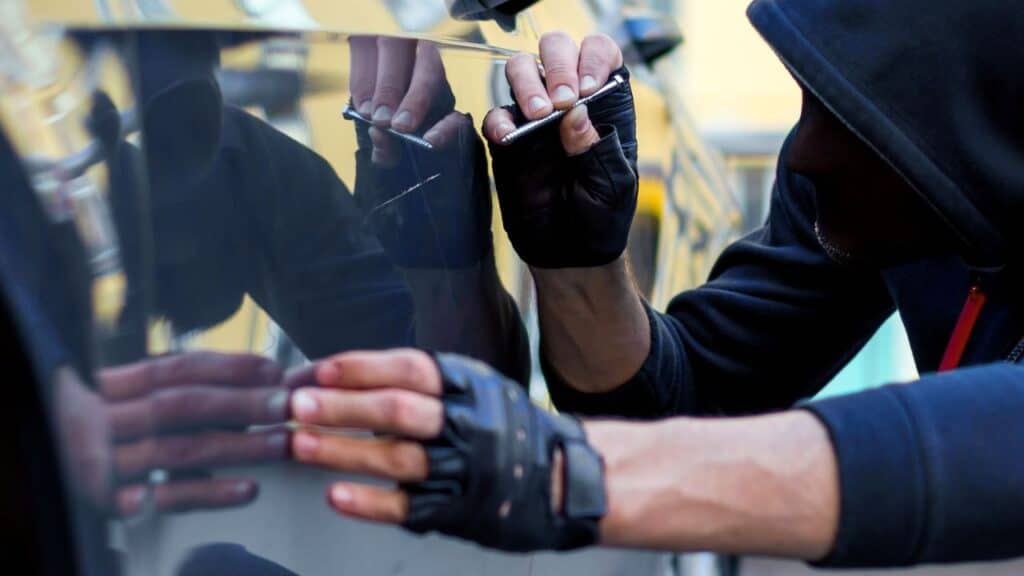
Another way of getting car scratches is through a deliberate act of vandalism. Having someone intentionally keying your vehicle or using any sharp object often creates the deepest (primer) gouges.
Discovering that your vehicle was vandalized is usually upsetting, and installing a dashcam on your vehicle is one way of catching the culprit.
What are the Levels of Paint Scratch?
To better understand the level of paint scratches, you need to know that your vehicle’s paint is made of three different layers — a primer coat, color coat, and clear coat. The depth of the scratch into the car’s paint distinguishes the level of the scratch.
1. Primer Scratch
The primer coat goes over the bare metal of the car and is usually about 10 to 40 microns thick. A primer scratch is often the deepest type of car scratch, as they penetrate through the clear coat and make it past the base coat into the primer.
These types of scratches are so deep into the vehicle paint that they can expose the body panel to rust when left untreated.
2. Color Coat or Base Coat Scratch
The color coat is the next layer that is sprayed on the primer coat. This coat gives your car its color and is about 10 to 40 microns thick.
Base coat scratches are also deep scratches but not as deep as primer scratches, as they only penetrate the clear coat and stop at the base coat. This level of scratch exposes the color coat and can cause paint contamination if left unattended.
3. Clear Coat Scratches
The third and final layer is the clear coat which gives the base coat its glossy shine and protects it from scratches. It is the thickest layer, with about 40 to 100 microns thick, and usually the easiest car scratch to fix since the damage doesn’t go deep. Fixing a clear coat scratch is pretty straightforward. Just buff out the scratch and polish it.
What is Minor vs. Major Scratch?
Going by the three levels and types of car scratches we’ve discussed, they can be further broken down into major and minor scratches. Minor scratches are light scratches that don’t go deep into the vehicle paint and are easy to fix. A clear coat scratch or paint transfer can be classified as a minor scratch.
Conversely, larger or deeper color coat and primer scratches can be classified as major scratches as they are usually deep into the vehicle paint and have a strenuous repair process.
What is the Difference Between Scuff and Scratch?

The thin line between scuff marks and car scratches allows people to mix up both. But still, there is a distinction between the two of them. Unlike scratches that go into the paint, scuff marks are usually on the surface sitting on the outermost layer — clear coat. Paint transfer is a good example of a scuff mark.
And like most minor scratches, scuff marks are usually simple to fix, and even inexperienced car owners can pull off such repairs without any fancy car scratch repair kit.
Depending on the severity of the scuff mark, you can use rubbing compound for mild scuffs or mineral spirit for more stubborn ones. You can check out our detailed guide on how to remove scuff marks.
FAQs
Does buffing remove all scratches?
No, buffing doesn’t remove all scratches. It is only effective for a small scratch like a clear coat or glass scratch. For deeper color coat or primer scratches, you will have to fill up the scratch with touch-up paint to effectively cover the scratch.
What is considered a major scratch?
Wider or deeper primer and color coat scratches can be classified as major scratches, as they require multiple sanding and several coats of touch-up paint to fix. And such types of scratches are often time-consuming to fix.
Does insurance cover scratches on a car?
Not all insurance policies cover car scratches. Only a comprehensive or collision coverage insurance policy covers the cost of repairing dents and scratches. Without these coverages, you may have to foot the cost of repairing your scratch.
How do you tell if it’s a deep scratch on my car?
There are several ways of checking if your car scratch is a deep one. You can do a quick fingernail test — you will feel deep scratches whenever you run your fingernail through one. You can also check by pouring a soap-water solution on it — unlike a clear coat scratch, deep scratches will remain visible.
How much does getting a deep scratch fixed by professional costs?
Having a deep gouge fixed by a professional can vary from $150 to $1,200. The price largely depends on the damage’s depth, vehicle make, model, color, and location. As you might imagine, fixing scratches at the dealership will be a bit more expensive than having the repair done by an independent body shop.
Final Thoughts
A light scratch on your vehicle is enough to damage your paint job and ruin your day. However, knowing how to fix car scratches will save you from expensive paint repairs and an awful day. We made a detailed guide on different types of car scratches with a step-by-step process on how to fix them yourself.
Related Content: