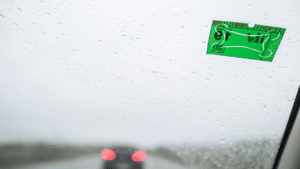
To remove inspection sticker from windshield to reuse requires patience. There are no quick methods where you can remove stickers off the windshield using brute force and expect it to be still in one piece. Read more about 11 ways to remove sticker from car window without damage
Reasons Why You Might Have to Remove An Inspection Sticker from Windshield to Reuse It
- The inspection sticker is tilted
- You are in a state where the inspection sticker is not required
- The sticker has an air bubble, so you would want to reapply it properly
- The adhesive is not sticky enough
- You have a broken windshield or just an old one, and you want to transfer it to a new one.
Or you are like me and want to remove it to get that perfect cleaning and detailing for every other car meet. Because, you know, every small detail counts and the inspection sticker looks ugly and has to go when you want to showcase your insane build. You can check how to remove dealer stickers.
How to Remove Inspection Sticker from Windshield to Reuse
I will take you through the whole process; I have a bunch of ways, so you can choose whatever option is most feasible to DIY.
For some of the methods, you don’t even have to go to the market, because most of the things I will use are basic household items. So let’s get started and remove inspection stickers.
A Must-Have Accessory to Remove Inspection Sticker from Windshield to Reuse: Razor Blade
Okay, I contradict myself here because you might not have this, but hear me out. A plastic razor blade can give you that initial small peel from where all the unsticking action would start.
You can use your fingernails to slowly lift the corner of the sticker. However, the fingernail method can be asymmetrical, which can lead to sticker tears, not to mention its painful.
The plastic razor blade will make a symmetrical peel through which the chemicals can seep under the sticker.
Please don’t use a sharp razor blade made of metal, even if you are using a clean razor, as it can scratch your glass surface, you don’t want to get a new windshield because of that, and not to mention it would tear the inspection sticker.
If you don’t have this tool, you can use an old credit card as an alternative to remove the inspection sticker.
Use Goo Gone
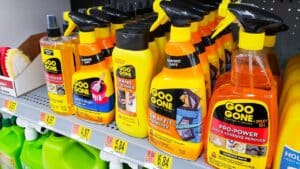
Goo gone is a great product through which you can remove any of the leftover residue — that sticky glue stuff. But is it going to remove inspection stickers? No, it won’t help remove inspection stickers; it’s more of a finishing product/adhesive remover.
After we remove car inspection stickers, one can’t help but notice the remaining adhesive/sticky residue on your car windshield, and to remove that sticky residue, you can use goo gone.
Steps to Achieve the Perfect Finish
After you successfully remove an inspection sticker, you can perform the following steps to get rid of the adhesive residue left on the windscreen.
- Apply the adhesive remover/goo gone on a clean microfiber cloth or wash mitt.
- Gently rub the surface
- You can use either linear or circular motions
- Spray it with an automotive glass cleaner to give it a nice spotless finish
Try Rubbing Alcohol/Isopropyl Alcohol
You would need a small spray bottle and/or cotton ball/paper towel with some isopropyl alcohol/rubbing alcohol.
It’s best to use 70% isopropyl alcohol. The higher concentrations can damage the paint surface in case it spills.
Steps to remove stickers without any tears using Rubbing alcohol
- After the inspection sticker starts to come off a little from one side, you can spray the isopropyl alcohol and gently rub the cotton/paper towel on it
- Spray it and let stay for a few minutes and repeat, you can use an old credit card to help lift it up.
- The idea is to let the isopropyl alcohol seep under the sticker, for which a spray bottle would do wonders
- While doing intermittent sprays, you can gently peel the inspection sticker a little and keep the spraying action going.
- Make sure not to peel the inspection sticker from the wrong side. Gently peel the inspection sticker; if you feel it won’t budge, try peeling it from another side.
Use WD-40
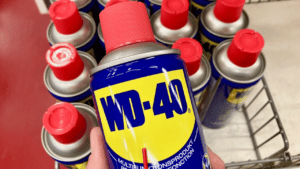
WD-40 and duct tape gets the crown for being the most useful products in the car world. You can use WD-40 to remove inspection stickers to reuse, and you probably have it lying around.
If you don’t have it, you should get one ASAP. It not only helps remove rust, it’s great for removing sticker adhesive from glass, thanks to that thin pipe that comes with it — it reaches under the sticker and seeps right between an inspection sticker and glass.
The only drawback is that the sticker gets a bit slippery and might be hard to pull, for which you can use paper towel or microfiber towel to wipe it.
A plastic razor can make the job much easier by gently lifting off the inspection sticker while letting the spray seep in and avoid scratching.
Steps to remove the pesky inspection sticker from your car without damaging it using WD-40
- Spray WD-40 with the straw attachment after lifting the inspection sticker from one corner.
- You can use a plastic razor (not the metal one, even if it’s a clean razor) blade to aid that initial peel.
- Keep going while gently lifting the sticker
- If you are good at using the plastic razor blade, it will help you all the way through
Try Using Ice
If you want to go for a home remedy, I have the ice method for you. It won’t be as fast as WD-40, but you would still be able to pull it off — would require a lot of patience though.
The ice can help solidify the inspection sticker adhesive and when it gets hard, the stickiness will reduce, making the peeling easier.
Steps-by-Step Procedure to remove the inspection sticker using ice cubes
- Keep rubbing the ice cube on the sticker from inside and outside.
- After a couple of minutes, you can try peeling it off a little from the corner and see if the adhesive is letting go of the sticker.
- Add ice cubes (about 5 for easy removal), the inspection sticker should start to give up
- Gently start lifting/peeling it off the windshield
- If it doesn’t budge, you can try from different sides and make your way to the problem patch
Try White Vinegar
White vinegar — Another great home remedy is to remove the inspection stickers from windshield to reuse. However, it won’t be as good as dedicated adhesive removers.
However, if you don’t have any adhesive removers, you can use white vinegar. You can also use soapy water if you don’t have white vinegar.
You would need white vinegar, a spray bottle, and a set of paper towels or microfiber cloths. You can also use cotton balls if you don’t have any other cloth.
How does it work — Step-by-Step Procedure
- Use your fingernails to peel a small portion from one side
- Spray the white vinegar spray to let it seep into it
- Wait for a couple of minutes and spray again
- Wipe it with a microfiber towel.
- Do intermittent sprays and keep on removing the sticker gently, and avoid using too much force
- Once the adhesive starts giving up, you can move on to removing the rest, and you are done.
Apply Heat
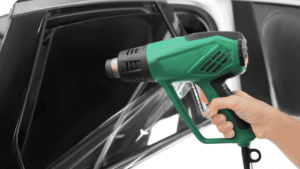
Heat can help reduce the bonding of the adhesive on the inspection sticker. You can use a blow dryer or the highest setting, or even better, you can use a heat gun.
If you have nothing, you can simply spray hot water or soapy water and wipe it for an hour or two.
Steps to get the inspection sticker off the glass in one piece, using a heat gun or hair dryer
- You would have to use the heat on both the outside and inside for a couple of minutes.
- Make sure to check if the inspection sticker is coming off easily or not. If you feel the sticker won’t come off, re-apply it and give it a good wipe.
- Keep on applying the heat while lifting the sticker
- And last but not least, my final words for you are to be patient.
It’s best to have a set of helping hands to keep the heat gun pointed on the sticker (outer windscreen) while removing.
Use Shaving Cream
When you have nothing in your arsenal, you might still have this thing called shaving cream. So does it work?
Kind of. It can give you some leverage to remove stickers. The hard part is to get it to seep under the inspection sticker. It means this method is going to take a lot of time.
You know that thing when you soak the dishes and tell everyone it needs to soak, and then you forget about it, it’s exactly that.
You would need shaving cream, cotton balls/paper towels, good fingernails, and a whole lot of patience.
Steps for removing stickers using shaving cream
- Spray a good amount of shaving cream (an inch thick) on the inspection sticker and forget about it (about an hour or more) for easier removal.
- After you realize that it has been soaking, I mean seeping into the sticker, get the corners
- Gently remove the sticker as far as it goes
- Repeat this process until the whole sticker come off
Apply Hairspray
When I say hairspray, I mean the one that has oil in it, not the styling spray, that would only improve adhesion rather than acting as an adhesive remover.
So if you have an oil-based hair spray that gives your hair that shiny glow, grab that spray and unleash it on the inspection sticker.
All the steps involved in removing the inspection sticker using hair spray
- You can lift off the sticker a little from the side and spray it with the hair spray so it seeps through.
- Keep spraying and removing the sticker little by little.
- Don’t pull it hard, as it can easily get torn and would look bad when you reapply it.
- The key is to let it work its magic — making the adhesive slippery rather than sticky.
- Repeat the spray-wait-peel process until the whole sticker is out.
Try Using Gasoline
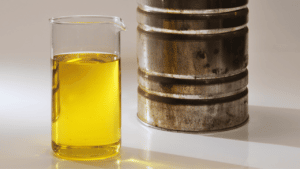
Gasoline works well for removing these stickers. Make sure you are very careful when using gasoline as it is highly inflammable.
Careful steps to remove the car inspection sticker using gasoline
- Keep your car door open — so in case there’s a fire, you can run away. I can’t really tell you that the fumes are harmful because I am guilty of sniffing that sweat scent of gasoline myself.
- Use cotton balls or a soft microfiber towel and pour some gasoline on it.
- Rub the corner of the car inspection sticker for a few minutes
- Grab the corners and rub them with gasoline–d cotton or soft microfiber cloth
- Repeat this process, and the sticker should come out
Caution: it requires a lot of time and patience.
Is it illegal to Remove an Inspection Sticker?
It’s not illegal to remove the inspection sticker while the car is still in your garage.
However, if you drive it on the road, it gives an officer a reasonable suspicion to conduct a traffic stop. So you might get pulled over for not having a car inspection sticker.
The towing companies that impound your car can be problematic as they can load your car and take it away without notice.
Make sure to check your state laws and see the time you have after the expiration date as well.
You might have seen a lot of modified cars going for a car meet getting pulled over — most of them don’t have the inspection sticker — so think about it.
My Best Way to Remove Inspection Stickers from Windshield
Even though there are many different ways to remove these stickers when you want to reuse them.
However, I would rely on my good old assistant WD-40 paired with a plastic razor blade — it’s the fastest method that removes inspection stickers without damaging your car’s glass surface or the inspection stickers themselves.
This duo of WD-40 and a plastic razor blade is best for removing all kinds of stickers or vinyl — it easily removes inspection stickers without damage.
You can even use them for clearing your counters, glass, painted surfaces, walls, interior, etc. it’s a multipurpose lubricant, and you can’t go wrong with it.
Make sure you do some practice rounds on other stickers before you move on to the windshield sticker for the first time. It will remove sticker residue as well.
How to Remove Inspection Sticker from Windshield to Reuse – Conclusion
To remove inspection sticker from windshield to reuse, you must remember four main points.
- Spraying action — applying the adhesive cleaner
- Seeping action — waiting for the adhesive as it goes to heaven
- Peeling action — intermittently involved around spraying adhesive cleaner and seeping
- Get all the edges — work your way from the corners and go inwards.
When you have all of these actions dialed in, it will make the sticker easier to remove from motor vehicles — unless the inspection sticker is made of paper; you can’t remove something from glass that goes to heaven together with the adhesive.
If you want the removal process to be smooth, I recommend having a plastic razor blade and a spray bottle for adhesive remover.
To remove sticker residue, you can use Goo Gone or WD-40.
To re-apply the inspection sticker without a problem, you can first store it in a plastic bag with some lint or oil to prevent it from sticking to itself. Use spray adhesive that works on wet surfaces and put the inspection sticker without a hitch.
Related Content: